Running a Production Dash App
We have been running our Dash apps in development mode, which is great for testing and debugging. However, when we want to deploy our app to production, we need to use a different approach. In production, we want to use a web server that can handle multiple requests and provide better performance. In this section, we will learn how to run a Dash app in production using Gunicorn, a popular Python WSGI HTTP server. We will also run our Dash app in a Docker container, which makes it easier to deploy and manage our application, and run it with Docker Compose, which allows us to define and run multi-container Docker applications. By the end of this section, students should be able to:
Run our Dash app in production using Gunicorn.
Run our Dash app in a Docker container.
Run our Dash app with Docker Compose.
What is Gunicorn?
Gunicorn (Green Unicorn) is a Python WSGI HTTP server for UNIX. WSGI stands for Web Server Gateway Interface, which is a specification that describes how a web server communicates with web applications. Gunicorn also uses a pre-fork worker model, which means that it forks multiple worker processes to handle requests. This allows it to handle multiple requests simultaneously, providing better performance and scalability for web applications. Gunicorn is compatible with various web frameworks, including Flask, Django, and FastAPI. It is easy to use and can be configured with various options to optimize performance and resource usage.
Running our Dash App with Gunicorn
To run a Dash app with Gunicorn, we need to set up a few things. First of all, we need to install Gunicorn.
Let’s first add it to our project dependencies by adding it to our requirements.txt file:
[mbs337-vm]$ cd pdb-dashboard
[mbs337-vm]$ echo "gunicorn" >> requirements.txt
[mbs337-vm]$ cat requirements.txt
dash
biopython
dash-bootstrap-components
dash-bio
gunicorn
Then, let’s activate our virtual environment and install the dependencies:
[mbs337-vm]$ source .venv/bin/activate
(.venv) [mbs337-vm]$ pip install -r requirements.txt
(.venv) [mbs337-vm]$ pip list | grep gunicorn
gunicorn                  25.1.0
The next step is to create a Gunicorn configuration file. This file will specify the settings for our
application, such as the number of worker processes and the port to bind to. We can create a file named
gunicorn_config.py with the following content:
workers = 2
bind = "0.0.0.0:8050"
loglevel = "info"
In this configuration, we are specifying that we want to use 2 worker processes to handle requests, and we are binding Gunicorn to all available IP addresses on port 8050, which is the default port for Dash apps. We are also setting the log level to “info” to get the base level of detail in our logs from Gunicorn.
Next, we need to make sure that our Dash app is set up to be run by Gunicorn. In our app.py file, we need
to make sure that we are creating a Flask server instance that Gunicorn can use. We can do this by initializing
our Dash app with the Flask server instance. Let’s modify our app.py file to include the following code:
# Initialize the Dash app
external_stylesheets = [dbc.themes.CERULEAN]
app = Dash(__name__, external_stylesheets=external_stylesheets)
server = app.server  # Expose the server instance for Gunicorn
Finally, we can run the Gunicorn server by executing the following command in our terminal:
(.venv) [mbs337-vm]$ gunicorn -c gunicorn_config.py app:server
[2026-03-11 17:05:26 +0000] [18376] [INFO] Starting gunicorn 25.1.0
[2026-03-11 17:05:26 +0000] [18376] [INFO] Listening at: http://0.0.0.0:8050 (18376)
[2026-03-11 17:05:26 +0000] [18376] [INFO] Using worker: sync
[2026-03-11 17:05:26 +0000] [18376] [INFO] Control socket listening at /home/ubuntu/mbs-337/pdb-dash/gunicorn.ctl
[2026-03-11 17:05:26 +0000] [18379] [INFO] Booting worker with pid: 18379
In this command, we are telling Gunicorn to use the configuration file we created and to run the application
defined in the app.py file. The app:server part specifies that we want to run the Dash app defined
in the app.py file, and we want to use the Flask server instance that is created when we initialize our
Dash app.
Containerizing our Dash App with Docker
Now that we have our Dash app running in production with Gunicorn, we can take it a step further and containerize it using Docker. Containerization allows us to package our application and its dependencies into a single container, which can be easily deployed and run on any platform that supports Docker. This makes it easier to manage our application and ensures that it runs consistently across different environments. Here is what our current directory structure looks like:
[mbs337-vm]$ cd pdb-dashboard
[mbs337-vm]$ ls
app.py      gunicorn_config.py  requirements.txt
If you remember from Unit 5, the first step in containerizing our Dash app is to create a Dockerfile. A Dockerfile is a text file that contains instructions for building a Docker image. Let’s create a Dockerfile in our current directory:
[mbs337-vm]$ touch Dockerfile
[mbs337-vm]$ ls
Dockerfile  app.py  gunicorn_config.py      requirements.txt
The important first step in our Dockerfile is to specify the base image we want to use. In this case, we will use the official Python runtime image, which is a lightweight image that includes Python and pip.
# Use an official Python runtime as a parent image
FROM python:3.12.13
We will also set the working directory in the container to /app. This is where our application files will be located in the container.
# Set the working directory in the container
WORKDIR /app
Next, we need to copy our application files into the container. We can use the COPY instruction to copy all the files from our current directory into the /app directory in the container.
# Copy the needed files into the container at /app
COPY app.py gunicorn_config.py requirements.txt /app/
With our application files in place, we need to install the dependencies for our Dash app. We can use the RUN instruction to execute a command in the container. In this case, we will use pip to install the dependencies from our requirements.txt file.
# Install any needed packages specified in requirements.txt
RUN pip install --no-cache-dir -r requirements.txt
Because our Dash app runs on port 8050, we need to expose this port in our Dockerfile. This allows us to access the Dash app from outside the container. We can use the EXPOSE instruction to specify that our application will listen on port 8050.
# Make port 8050 available to the world outside this container
EXPOSE 8050
Finally, we need to specify the command to run our Dash app when the container starts. We will use the CMD instruction to specify the command to run Gunicorn with our application. The command will tell Gunicorn to use the configuration file we created and to run the application defined in the app.py file.
# Run app.py when the container launches
CMD ["gunicorn", "-c", "gunicorn_config.py", "app:server"]
Putting it all together, our complete Dockerfile should look like this:
# Use an official Python runtime as a parent image
FROM python:3.12.13

# Set the working directory in the container
WORKDIR /app

# Copy the needed files into the container at /app
COPY app.py gunicorn_config.py requirements.txt /app/

# Install any needed packages specified in requirements.txt
RUN pip install --no-cache-dir -r requirements.txt

# Make port 8050 available to the world outside this container
EXPOSE 8050

# Run app.py when the container launches
CMD ["gunicorn", "-c", "gunicorn_config.py", "app:server"]
Now that we have our Dockerfile ready, we can build our Docker image. We can use the docker build command to
build the image from our Dockerfile. We will tag the image with an owner, <username>, a name, such as
“pdb-dashboard”, and version, “1.0”. Here is the command to build the Docker image:
[mbs337-vm]$ docker build -t <username>/pdb-dashboard:1.0 .
Sending build context to Docker daemon  17.92kB
Step 1/6 : FROM python:3.12.13
...
Successfully built d65ae3a6f707
Successfully tagged <username>/pdb-dashboard:1.0
Using Docker Compose to Run our Dash App
Now that we have our Dash app running in a Docker container, we can take it a step further and use Docker Compose
to manage our application. Remember from Unit 5, Docker Compose is a tool that allows us to define and run
multi-container Docker applications. With Docker Compose, we can define our application services, networks,
and volumes in a single YAML file, and then use a single command to start and stop our application. This makes
it easier to manage our application and ensures that all the components of our application are running together.
This even makes sense for our simple, single-container Dash app, as it simplifies deployment and allows us to
easily scale our application in the future if needed. Let’s create a Docker Compose file named
docker-compose.yml in our current directory:
[mbs337-vm]$ touch docker-compose.yml
[mbs337-vm]$ ls
Dockerfile  app.py  docker-compose.yml  gunicorn_config.py  requirements.txt
In our Docker Compose file, we will define a service for our Dash app. We will specify that we want to build the image for the service, which is the Docker image we built earlier, and give the container a name.
---
services:
  dash-app:
    build:
      context: .
      dockerfile: Dockerfile
    container_name: dash-app
We will also specify the ports to expose for the service, which will allow us to access our Dash app from outside the container.
---
services:
  dash-app:
    build:
      context: .
      dockerfile: Dockerfile
    container_name: dash-app
    ports:
      - "8050:8050"
In addition, we will specify a volume to save our downloaded PDB files, which will allow us to persist our data even if the container is stopped or removed.
---
services:
  dash-app:
    build:
      context: .
      dockerfile: Dockerfile
    container_name: dash-app
    ports:
      - "8050:8050"
    volumes:
      - ./pdb_files:/app/pdb_files
The final thing we need to do is to specify a restart policy for our service, which will ensure that our Dash app is automatically restarted if it crashes or the server is restarted. The preferred restart policy for our Dash app is “unless-stopped”, which means that the container will be restarted unless it is explicitly stopped by the user.
---
services:
  dash-app:
    build:
      context: .
      dockerfile: Dockerfile
    container_name: dash-app
    ports:
      - "8050:8050"
    volumes:
      - ./pdb_files:/app/pdb_files
    restart: unless-stopped
With our Docker Compose file ready, we can start our application by running the following command in our terminal:
[mbs337-vm]$ docker-compose up -d
[+] Building 0.2s (10/10) FINISHED                                                                                      docker:default
 => [dash-app internal] load build definition from Dockerfile                                                                     0.0s
 => => transferring dockerfile: 578B                                                                                              0.0s
 => [dash-app internal] load metadata for docker.io/library/python:3.12.13                                                        0.0s
 => [dash-app internal] load .dockerignore                                                                                        0.0s
 => => transferring context: 46B                                                                                                  0.0s
 => [dash-app 1/4] FROM docker.io/library/python:3.12.13                                                                          0.0s
 => [dash-app internal] load build context                                                                                        0.0s
 => => transferring context: 100B                                                                                                 0.0s
 => CACHED [dash-app 2/4] WORKDIR /app                                                                                            0.0s
 => CACHED [dash-app 3/4] COPY app.py gunicorn_config.py requirements.txt /app/                                                   0.0s
 => CACHED [dash-app 4/4] RUN pip install --no-cache-dir -r requirements.txt                                                      0.0s
 => [dash-app] exporting to image                                                                                                 0.0s
 => => exporting layers                                                                                                           0.0s
 => => writing image sha256:94b701c46a07be886964b91430531c8ce44eec183b4abe6aa4087236a2d00c5f                                      0.0s
 => => naming to docker.io/library/pdb-dash-dash-app                                                                              0.0s
 => [dash-app] resolving provenance for metadata file                                                                             0.0s
[+] Running 3/3
 ✔ dash-app                  Built                                                                                                0.0s
 ✔ Network pdb-dash_default  Created                                                                                              0.3s
 ✔ Container dash-app        Started
And verify that our Dash app is running by running the following command:
[mbs337-vm]$ docker compose ps
NAME       IMAGE               COMMAND                  SERVICE    CREATED         STATUS         PORTS
dash-app   pdb-dash-dash-app   "gunicorn -c gunicor…"   dash-app   2 minutes ago   Up 2 minutes   0.0.0.0:8050->8050/tcp, [::]:8050->8050/tcp
Now we can navigate to http://<IP_ADDRESS>:8050/ in our web browser to see our Dash app running in
production!
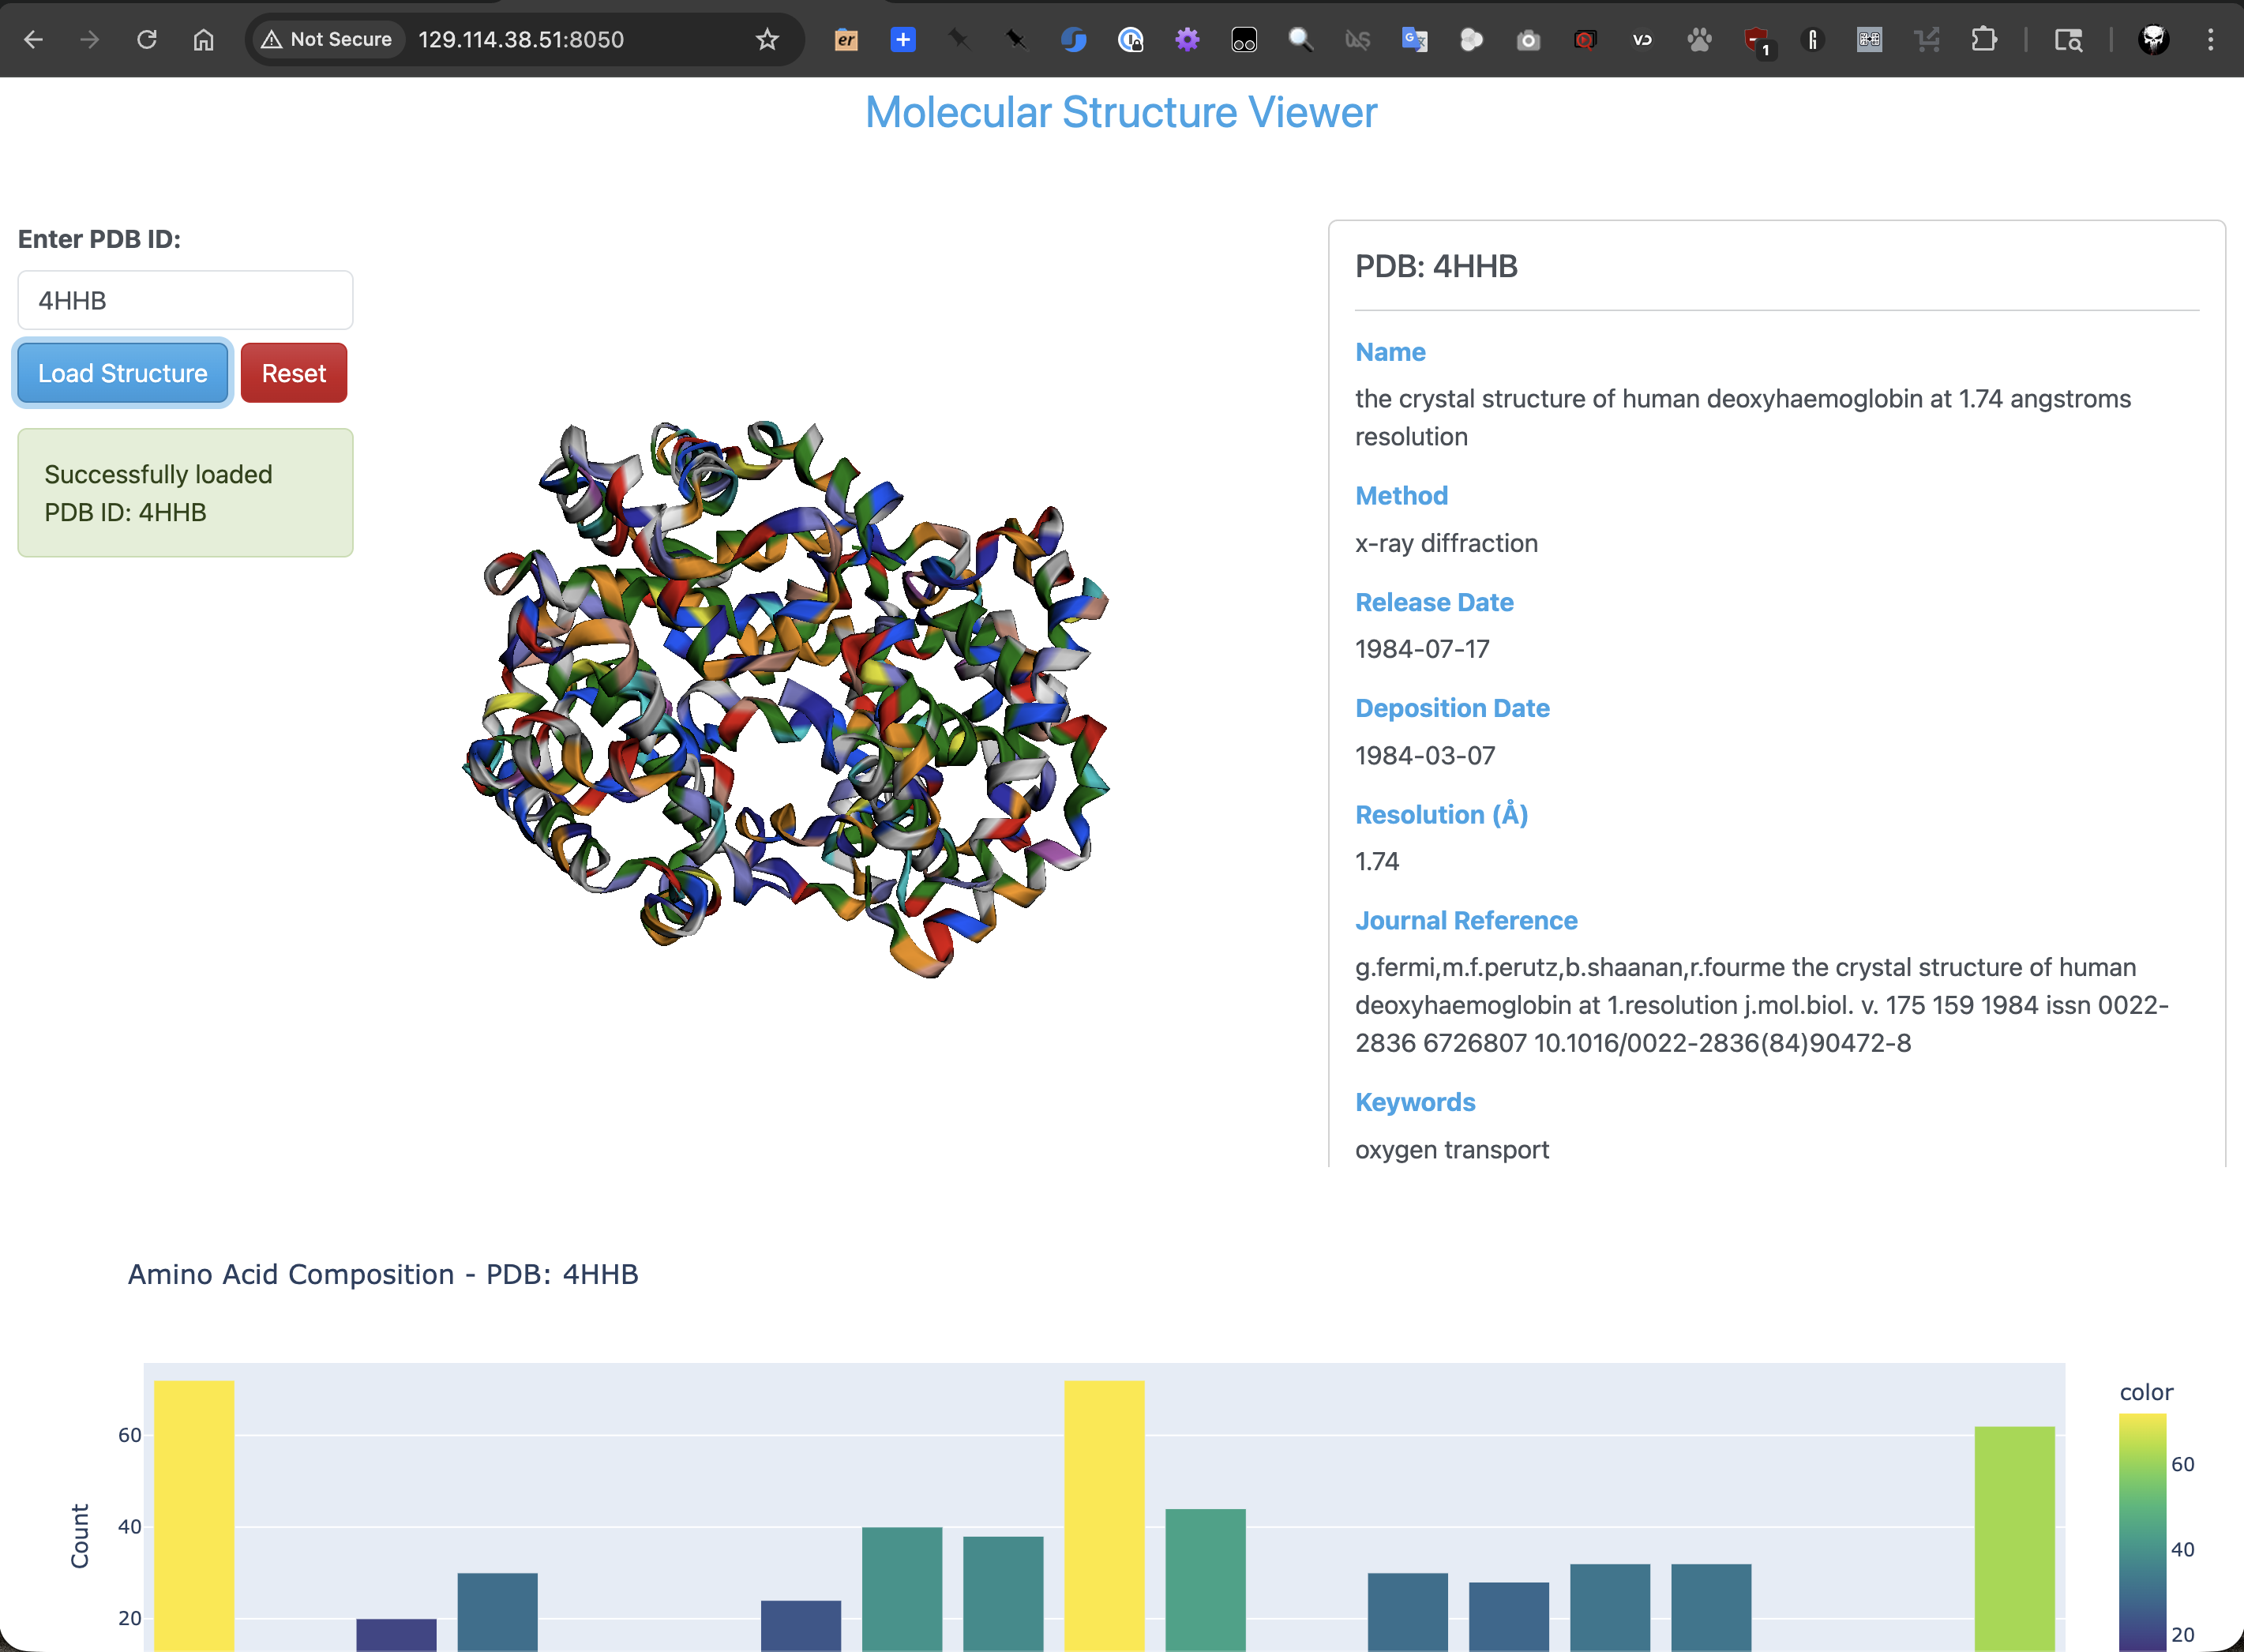
PDB dashboard application running in production with Gunicorn and Docker Compose.
And to stop our application, run the following command:
[mbs337-vm]$ docker-compose down
[+] Running 2/2
 ✔ Container dash-app        Removed                                                                                              0.8s
 ✔ Network pdb-dash_default  Removed