Linux Essentials
Why Learn Linux & The Command-Line Interface
Modern biological research is conducted primarily on Linux-based systems. Most research computing infrastructure, including the HPC clusters and cloud resources at TACC, runs Linux and supports software developed for Linux environments.
These systems are accessed through a command-line interface (CLI), a text-based interface where users type commands to interact directly with a computer. In research computing, the CLI is used to log into remote systems, manage files, and launch computational analyses.
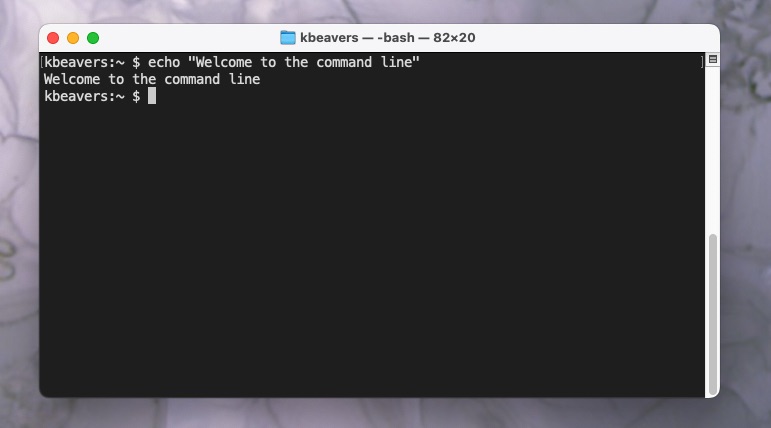
A simple echo command typed into a terminal window, demonstrating the command-line interface.
Learning how to use the Linux command line interface is therefore an essential skill for modern biologists. Once you are comfortable working in a Linux environment, you can work on virtually any research computing system in the world.
What You Will Learn
In this section, students will learn how to:
Describe basic functions of essential Linux commands
Use Linux commands to navigate a file system and manipulate files
Transfer data to / from a remote Linux file system
Edit files directly on a Linux system using a command line utility (
vim)
Topics covered in this module include:
Creating and navigating folders (
pwd,ls,mkdir,cd,rmdir)Creating and manipulating files (
touch,rm,mv,cp)Looking at the contents of files (
cat,less,head,tail,grep)Network and file transfers (
ssh,scp)Text editing (
vim)
Log in to the Class Server
All computing for this course will take place on Linux virtual machines (VMs). To reach them, you will connect in two steps:
First, we’ll connect to
student-login.tacc.utexas.edu. This is a persistent Linux VM at TACC that acts as a login gateway (jump host).Second, from
student-login, you’ll connect to your own personal course VM. This VM is namedmbs-337and is hosted on JetStream2.
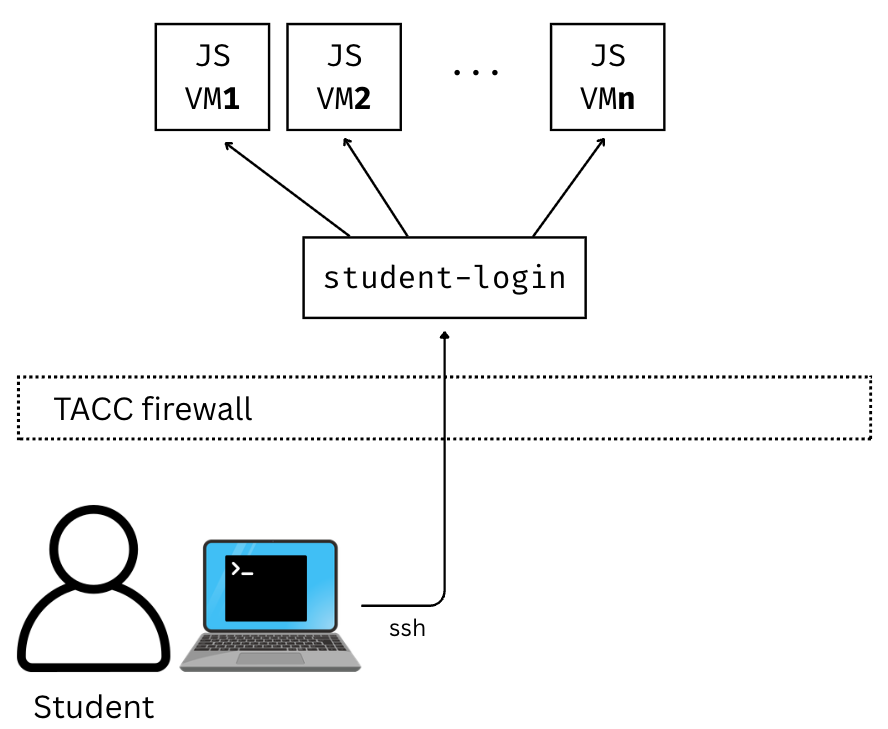
Controlled access architecture for Jetstream2 VMs.
To connect from your own computer, you will use the Secure Shell (SSH) protocol through a CLI or an SSH client. The exact steps depend slightly on your computer’s operating system.
Mac / Linux
MacOS and Linux machines both include a terminal application by default. To open a terminal on macOS:
Press
Command+Spacebarto open Spotlight searchType Terminal
Press
Enter
From the terminal, connect to the TACC login VM (replace username with your TACC username):
ssh username@student-login.tacc.utexas.edu
(enter password)
(enter MFA token)
Windows
Windows does not include a native Linux shell by default to run the SSH protocol. That’s okay – you just need to download an SSH client, which is a program that securely connects your computer to a remote Linux system. We recommend PuTTY (Choose the 64-bit x86 installer).
To connect:
Open the application 'PuTTY'
Enter Host Name: student-login.tacc.utexas.edu
(Click 'Open')
(Enter username)
(Enter password)
(Enter MFA token)
Chromebook
Chromebooks can run a Linux shell using ChromeOS’s built-in Linux support:
Open Settings
Go to Advanced -> Developers
Enable Linux development environment
Once enabled, you can open the Terminal app from your launcher and connect using SSH:
ssh username@student-login.tacc.utexas.edu
(enter password)
(enter MFA token)
Confirming Your Login
You have successfully connected to student-login when you see a message similar to this:
------------------------------------------------------------------------------
------------------------------------------------------------------------------
Welcome to the Texas Advanced Computing Center
   at The University of Texas at Austin

** Unauthorized use/access is prohibited. **

If you log on to this computer system, you acknowledge your awareness
of and concurrence with the UT Austin Acceptable Use Policy. The
University will prosecute violators to the full extent of the law.

TACC Usage Policies:
http://www.tacc.utexas.edu/user-services/usage-policies/

TACC Support:
https://portal.tacc.utexas.edu/tacc-consulting

------------------------------------------------------------------------------
kbeavers@student-login:~$
Once you are connected to student-login, the next step is the same for everyone regardless of the operating system of your computer (since we are now all on the same Linux login host).
From the student-login prompt, type:
ssh mbs-337
You won’t need to provide a username or password this time, since your credentials are automatically forwarded from the login VM.
If the connection is successful, you will see Jetstream2 status information similar to the following:
══════════════════════════https://jetstream.status.io/══════════════════════════

Overall Jetstream2 Status:   Operational

Active Status Items:
◦   Scarce availability of g3.xl resources

Scheduled Maintenance:
◦   (2026-01-02T12:00:00.000Z - 2026-01-03T00:00:00.000Z) Upcoming maintenance outage on January 2, 2026

════════════════════════════════════════════════════════════════════════════════
At this point, you are successfully logged in to your personal Linux VM for the course and ready to begin working!
Creating and Manipulating Files
So far, we’ve learned how to navigate the filesystem and perform operations with directories. But what about files? Just like on Windows or MacOS, Linux allows you to create, move, copy, rename, and delete files with the CLI.
Creating and Removing Files
First, let’s make sure we are in our home directory and create a few directories and files.
We’ll use the touch command to create an empty file:
$ cd # cd on an empty line will automatically take you back to the home directory
$ pwd
/home/ubuntu
$ mkdir folder1
$ mkdir folder2
$ mkdir folder3
$ touch file_a
$ touch file_b
$ touch file_c
$ ls
file_a file_b file_c folder1 folder2 folder3
These files we have created are all empty. Removing a file is done with the rm (remove) command.
$ touch junkfile
$ rm junkfile
Moving and Copying Files
Files are moved or renamed using mv and copied using cp. These commands work similarly to how you would expect on a Windows or Mac computer — the context around the move or copy operation determines what the result will be. In other words, mv and cp work on paths.
To demonstrate this, let’s move file_a into folder1 and file_b into folder2. We’ll also copy file_c into folder3.
$ mv file_a folder1/
$ mv file_b folder2/
$ cp file_c folder3/
Question
Take a moment to predict what the command ls would print if we used it in our current directory.
$ ls
file_c folder1  folder2  folder3
$ ls folder1
file_a
$ ls folder2
file_b
$ ls folder3
file_c
Two files have been moved into folders, and file_c has been copied - so there is still a copy of file_c in the home directory.
Move and copy commands can also be used to change the name of a file:
$ cp file_c file_c_copy
$ mv file_c file_c_new_name
Tip
By now, you may have discovered that Linux is very unforgiving of typos. Three habits will save you a lot of frustration:
Press
<Tab>to auto-complete file and directory namesUse
<UpArrow>to cycle through previous commandsAvoid spaces and special characters in file names. Stick to:
A-Z   # capital letters
a-z   # lowercase letters
0-9   # digits
-     # hyphen
_     # underscore
.     # period
Before we move on, let’s clean up once again by removing the files and folders we just created.
$ rm -r folder1
$ rm -r folder2
$ rm -r folder3
How do we remove file_c_copy and file_c_new_name?
$ rm file_c_copy
$ rm file_c_new_name
Looking at the Contents of Files
So far, we’ve been working with empty files and folders. Real research data, of course, is not empty. Let’s start exploring the contents of actual files using more Linux commands.
First, make sure you are in your home directory and copy a public file from the system into your own workspace.
$ cd ~
$ pwd
/home/ubuntu
$ cp /usr/share/dict/words .
$ ls
words
Try to use <Tab> to autocomplete the name of the file. Also, please notice the single dot . at the end of the copy command, which indicates that you want to copy the file to your current location (the home directory).
The words file is a standard dictionary file found on many Linux systems. It contains 479,828 words, each on its own line. To print the entire contents of the file to the screen, use cat.
$ cat words
A
AA
AAA
AA's
AB
ABC
ABC's
ABCs
ABM
ABM's
...
This is a long file! Printing everything to the screen is not very useful. Instead, we can view files one screen at a time with the less command:
$ less words
Scrolling through the data is the same, but now we can also search the data. Press the / forward slash key, and type a word that you would like to search for. The screen will jump down to the first match of that word. The n key will cycle through other matches, if they exist. You can exit this view by pressing the q key.
Finally, you can view just the beginning or the end of a file with the head
and tail commands. For example:
$ head words
$ tail words
By default, these commands show 10 lines, which is often enough for a quick check.
Redirecting Output to Files
Up to this point, all command output has gone to the screen. Linux allows you to redirect this output into files instead.
Use > to redirect the output of a command to a new file:
$ cat words > words_new.txt
$ head words > first_10_lines.txt
A single greater than sign > will redirect and overwrite any contents in
the target file. A double greater than sign >> will redirect and append
any output to the end of the target file.
Question
What would happen if I ran the following?
$ tail words >> first_10_lines.txt
What about this?
$ tail words > words_new.txt
Be careful with these redirect commands – it is easy to accidentally overwrite or change the contents of files without meaning to!
Searching Files with Grep
Another essential tool is the grep command, which searches a file for a specific pattern, and returns all lines that match the pattern. For example:
$ grep "banana" words
banana
banana's
bananas
Quotes around the search term are not always required, but they are a good habit — especially when searching for patterns that include spaces or special characters.
Network and File Transfers
In biological research, you’ll often need to transfer files between your local computer and remote computing systems. HPC systems like your course VM have computational resources and specialized software that aren’t available on typical personal computers. File transfer allows you to leverage the strengths of both systems by moving data and results between them as needed.
To log in or transfer files to a remote Linux file system you must know the hostname (the unique network identifier of the computer you are connecting to) and the username (who you are). If you are already on a Linux file system, those are easy to determine using the following commands:
$ whoami
ubuntu
$ hostname
mbs-337
As we learned earlier, connecting to your course VM requires two steps because we use a jump host:
First, we connected to
student-login.tacc.utexas.edu(the jump host)Then, from the jump host, we connected to
mbs-337(your course VM)
Logging out of a remote system is done using the logout command, or the shortcut <Ctrl+d>:
[ubuntu@mbs-337]$ logout
[kbeavers@student-login]$ logout
[local]$
Copying files from your local computer to your Jetstream2 VM requires a two-step process using the scp command (Windows users can use WinSCP):
Step 1: Transfer from your local computer to the jump host
[local]$ scp my_file username@student-login.tacc.utexas.edu:~
(enter password)
(enter MFA token)
Step 2: Transfer from the jump host to your course VM
[local]$ ssh username@student-login.tacc.utexas.edu
(enter password)
(enter MFA token)
[student-login]$ scp my_file mbs-337:~
Notice that when transferring from student-login to mbs-337, you don’t need to specify a username or password because your credentials are automatically forwarded.
Copying files from your VM to your local computer
To copy files in the opposite direction, reverse the process:
[student-login]$ scp mbs-337:/home/ubuntu/my_file .
[student-login]$ logout
[local]$ scp username@student-login.tacc.utexas.edu:/home/username/my_file .
(enter password)
(enter MFA token)
Tip
Important: Where to Run File Transfer Commands
When transferring files between your local computer and a remote system, you must run the command from your local computer. This is because remote systems typically cannot initiate connections to local machines behind inbound firewall restrictions.
For transfers between student-login and mbs-337, you can run the command from either machine because you are already authenticated.
Transferring Directories
To copy entire directories, use the recursive flag (scp -r):
[local]$ scp -r my_folder username@student-login.tacc.utexas.edu:/home/username
[student-login]$ scp -r my_folder mbs-337:/home/ubuntu
This covers the basics of copying files. For more advanced file transfer options, you can explore tools like rsync in your own time.
Text Editing with VIM
VIM is a text editor used on Linux file systems.
Open a file (or create a new file if it does not exist):
$ vim file_name
There are two “modes” in VIM that we will talk about today. They are called “insert mode” and “normal mode”. In insert mode, the user is typing text into a file as seen through the terminal (think about typing text into TextEdit or Notepad). In normal mode, the user can perform other functions like save, quit, cut and paste, find and replace, etc. (think about clicking the menu options in TextEdit or Notepad). The two main keys to remember to toggle between the modes are i and Esc.
Entering VIM insert mode:
> i
Entering VIM normal mode:
> Esc
A summary of the most important keys to know for normal mode are:
# Navigating the file:

arrow keys        move up, down, left, right
    Ctrl+u        page up
    Ctrl+d        page down

         0        move to beginning of line
         $        move to end of line

        gg        move to beginning of file
         G        move to end of file
        :N        move to line N

# Saving and quitting:

        :q        quit editing the file
        :q!       quit editing the file without saving

        :w        save the file, continue editing
        :wq       save and quit
Review of Topics Covered
Part 1: Creating and navigating folders
Command |
Effect |
|---|---|
|
print working directory |
|
list files and directories |
|
list files in column format |
|
make a new directory |
|
navigate into a directory |
|
remove an empty directory |
|
remove a directory and its contents |
|
refers to the present location |
|
refers to the parent directory |
Part 2: Creating and manipulating files
Command |
Effect |
|---|---|
|
create a new file |
|
remove a file |
|
remove a directory and its contents |
|
move a file into a directory |
|
change the name of a file |
|
change the name of a directory |
|
copy a file |
|
copy a directory |
|
autocomplete file or folder names |
|
cycle through command history |
Part 3: Looking at the contents of files
Command |
Effect |
|---|---|
|
print file contents to screen |
|
redirect output to new file |
|
scroll through file contents |
|
output beginning of file |
|
output end of a file |
|
search for ‘pattern’ in a file |
|
shortcut for home directory |
|
force interrupt |
|
redirect and overwrite |
|
redirect and append |
Part 4: Network and file transfers
Command |
Effect |
|---|---|
|
print hostname |
|
print username |
|
remote login |
|
logout |
|
copy a file from local to remote |
|
copy a file from remote to local |
|
logout of host |
Part 5: Text editing with VIM
Command |
Effect |
|---|---|
|
open “file.txt” and edit with |
|
toggle to insert mode |
|
toggle to normal mode |
|
navigate the file |
|
quit editing the file |
|
quit editing the file without saving |
|
save the file, continue editing |
|
save and quit |
Additional Resources
This is a good summary of the important commands you need to know
Practice VIM on the command line by typing
vimtutor