Working with Structure Data (PDBx/mmCIF)
In this hands-on module, we will learn how to work with the mmCIF data format. mmCIF is the modern, machine-friendly format used by the RCSB Protein Data Bank (PDB) to store 3D macromolecular structures and their associated metadata.
mmCIF files are used to represent experimentally determined and computationally predicted structures, including proteins, nucleic acids, and molecular complexes.
After completing this module, students should be able to:
Identify and understand valid mmCIF files
Explain what types of information mmCIF stores (atoms, residues, chains, metadata)
Read mmCIF files into Python objects using Biopython
Navigate the structure hierarchy (Structure → Model → Chain → Residue → Atom)
Extract common data (coordinates, residue IDs, chain IDs, B-factors, occupancy)
Write or export structures back to mmCIF format
Macromolecular structure context
mmCIF files describe macromolecular structures, meaning the three-dimensional positions of atoms in a biological system. While many entries in the Protein Data Bank are proteins, mmCIF is not protein-specific. It can represent a wide range of structures, including:
Proteins and protein complexes
DNA and RNA
Protein–nucleic acid complexes
Small-molecule ligands, ions, cofactors, and waters
Biological function depends strongly on 3D shape. Binding sites, active sites, molecular recognition, and molecular interactions are determined by how atoms and residues are arranged in space. Structural data come from experiments such as X-ray crystallography, NMR spectroscopy, and cryo-electron microscopy, or from computational prediction methods such as AlphaFold.
The Protein Data Bank archives these structures so they can be analyzed, visualized, and compared.
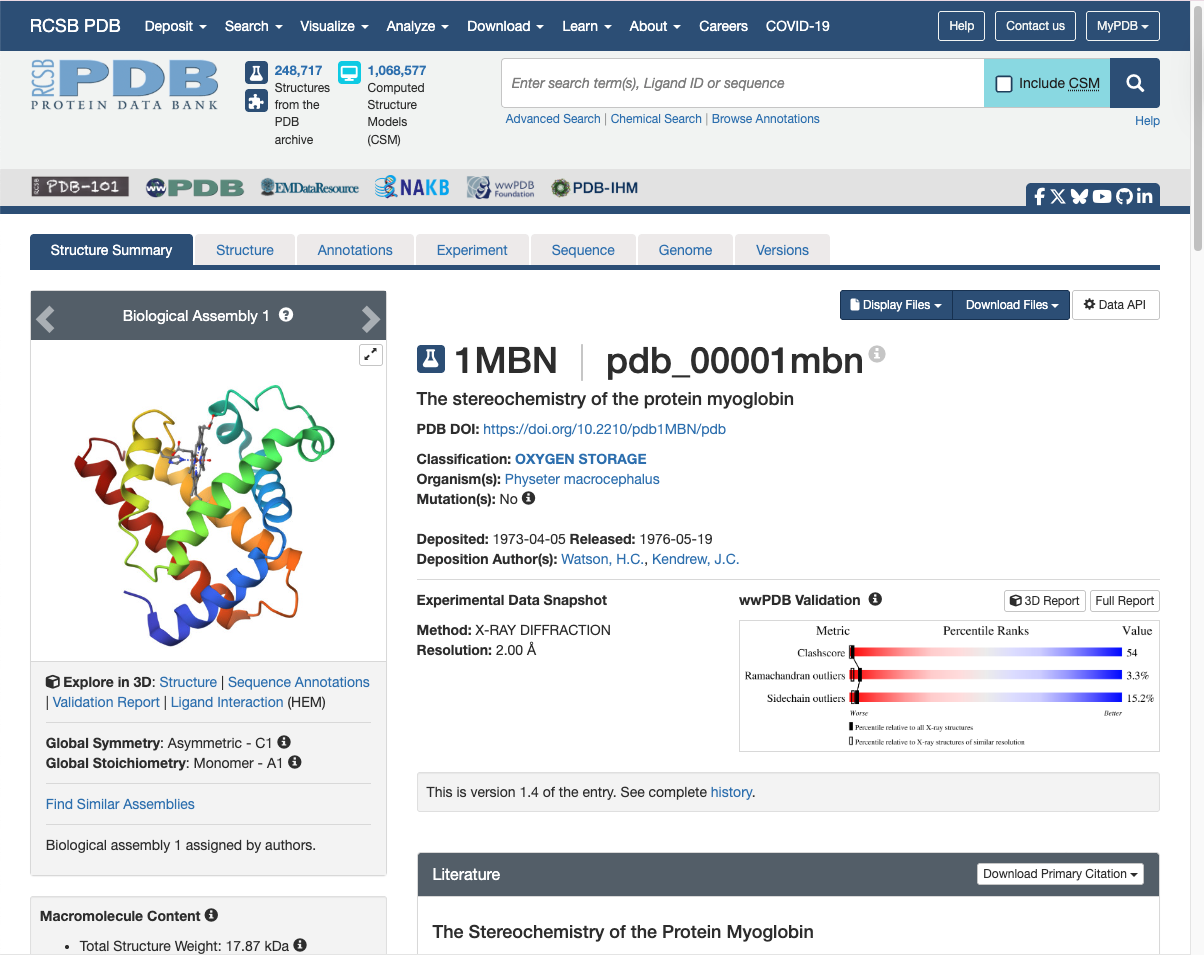
Structure summary of PDB Entry 1MBN.
Fun fact: this was the first protein to have its 3D structure revealed by X-ray crystallography. John Kendrew was awarded the Nobel Prize in Chemistry in 1962 for this achievement.
What is mmCIF?
PDBx/mmCIF, or simply mmCIF, stands for “Macromolecular CIF”. This name is derived from
the “Crystallographic Information File (CIF)” format, which was created to store small molecule
crystallographic experiments. mmCIF uses the same syntax and file extension as CIF (.cif),
but uses a different, much larger, and extensible dictionary.
Note
Note: The PDB now exclusively uses mmCIF (PDBx/mmCIF) for archiving data, making it the essential format for modern structural biology, whereas standard CIF is mostly used in chemical crystallography.
A typical mmCIF contains:
Atom-level coordinates (x, y, z) for each atom
Atom identity (element, atom name), residue identity (amino acid), chain identity
Optional values like occupancy and B-factor (temperature factor)
Experimental metadata (method, resolution, authors, citations)
Chemical component definitions (ligands, modified residues)
mmCIF Format Basics
While mmCIF files can be intimidating at first, they are built from just a few core concepts. At a high level, an mmCIF file consists of:
Data Blocks: contain information for one structure (some mmCIF files contain multiple structures)
Data items: single name-value pairs for metadata fields
Loops: contains tables with rows corresponding to column names (more on this below)
Data Blocks
Every mmCIF file begins with a data block, which is introduced by a line starting with data_:
data_1MBN
The text after data_ is the data block identifier, usually the PDB ID (e.g. “1MBN”).
A data block defines a logical boundary for one structure entry.
Important rules:
A file may contain one or more data blocks
Each data block describes one structure
A data block ends when another
data_line is encountered or the file ends
Data Items (Name-Value Pairs)
The simplest information in a mmCIF file is stored as data items, which are single name-value pairs:
_struct.title 'The stereochemistry of the protein myoglobin'
This line has three parts:
_struct.title: The data item name'The stereochemistry of the protein myoglobin': The valueWhitespace separates name from values
All mmCIF data item names begin with a leading underscore and have the form
_category.keyword. In the example above:
_struct= the categorytitle= the keyword (which must be unique within the category)
Note
Data Items Syntax:
Data item names are not case-sensitive
Each data item must have exactly one value
Values may be numbers, short strings (quoted or unquoted), or special placeholders:
?= value is missing.= value is not applicable or intentionally omitted
Text Values and Multi-line Strings
Short text values may be enclosed in single or double quotes, or can be unquoted:
_entity_src_gen.gene_src_common_name               'sperm whale'
_entity_src_gen.gene_src_genus                     Physeter
_entity_src_gen.pdbx_gene_src_scientific_name      'Physeter catodon'
Long text values that span multiple lines are enclosed by semicolon delimiters placed at the start of a line:
_entity_poly.pdbx_seq_one_letter_code
;VLSEGEWQLVLHVWAKVEADVAGHGQDILIRLFKSHPETLEKFDRFKHLKTEAEMKASEDLKKHGVTVLTALGAILKKKG
HHEAELKPLAQSHATKHKIPIKYLEFISEAIIHVLHSRHPGDFGADAQGAMNKALELFRKDIAAKYKELGYQG
;
Everything between the semicolons is treated as a single text value.
Loops (Tables)
Many types of data occur multiple times (atoms, residues, authors, citations, etc.).
These are stored using the loop_ directive, which defines a table.
A loop has two parts:
A list of column names (data item names)
Rows of values corresponding to those columns
For example, let’s take a look at the simplified _atom_site loop. This is often the
most crucial information contained in a mmCIF file:
loop_
_atom_site.label_atom_id
_atom_site.label_comp_id
_atom_site.Cartn_x
_atom_site.Cartn_y
_atom_site.Cartn_z
N  VAL  -2.900  17.600  15.500
C  VAL  -3.600  16.400  15.300
C  VAL  -3.000  15.300  16.200
O  VAL  -3.700  14.700  17.000
The first line (loop_) starts the table. Then, the lines starting with _atom_site. define the
columns of the table:
label_atom_id: The atom name within the residue (e.g., N, C, O)
label_comp_id: The residue name (here, VAL = valine)
Cartn_x,Cartn_y,Cartn_z: The atom’s x, y, and z coordinates in 3D space (in Ångströms)
Each line below the headers provides values for one atom, in the same order as the column header. For example, the first row:
N VAL -2.900 17.600 15.500
means: Atom N (the backbone nitrogen) in residue VAL (valine) is located at coordinates (−2.900, 17.600, 15.500) Å
Working with mmCIF files
Let’s get some practice working with mmCIF files. We’ll use VSCode for these exercises. Open a VSCode RemoteSSH session and create a new terminal.
Within the terminal inside VSCode on your class VM, navigate to your mbs-337/working-with-bio-data project directory.
We’re going to use a new command called wget to download a mmCIF file directly from
RCSB PDB. This command allows us to retrieve files directly from the internet
by providing a URL to the data we want to download.
Within your VS Code terminal, use the below command to download the mmCIF file for PDB Entry 1MBN.
[mbs-337]$ wget https://files.rcsb.org/download/1MBN.cif.gz
--2026-02-02 21:44:40--  https://files.rcsb.org/download/1MBN.cif.gz
Resolving files.rcsb.org (files.rcsb.org)... 13.33.82.83, 13.33.82.18, 13.33.82.74, ...
Connecting to files.rcsb.org (files.rcsb.org)|13.33.82.83|:443... connected.
HTTP request sent, awaiting response... 200 OK
Length: unspecified [application/gzip]
Saving to: ‘1MBN.cif.gz’

1MBN.cif.gz                               [ <=>     ]  36.54K  --.-KB/s    in 0.02s

2026-02-02 21:44:40 (2.15 MB/s) - ‘1MBN.cif.gz’ saved [37416]
You now have a file called 1MBN.cif.gz in your working-with-bio-data directory!
If you try to open this file, you’ll see that it does not display in the text editor. That’s
because we downloaded a compressed version of the mmCIF — the .gz file ending means that
this file has been compressed using the GNU Zip (Gzip) algorithm to reduce the file size
for storage and faster transfer.
The first thing we need to do is decompress this file to its original format:
[mbs-337]$ gunzip 1MBN.cif.gz
The .gz file ending should be gone now, and you should be able to view your mmCIF
file in the text editor.
Helpful Linux Commands
You can inspect an mmCIF file from the command line:
# Print the first 20 lines
[mbs-337]$ head -n 20 1MBN.cif

# Find the title of the structure
[mbs-337]$ grep "_struct.title" 1MBN.cif

# Find lines that start a data block
[mbs-337]$ grep "^data_" 1MBN.cif
Read mmCIF from File
Biopython provides MMCIFParser in Bio.PDB for reading .cif files. The parser
converts the text file into a Structure object that you can query and iterate over.
Activate your Python virtual environment and create a file called mmcif_ex.py:
from Bio.PDB.MMCIFParser import MMCIFParser

# Create a parser using the MMCIFParser Class (blueprint)
parser = MMCIFParser()

with open('1MBN.cif', 'r') as f:
    # Use .get_structure method on our parser to create a structure object
    structure = parser.get_structure('myoglobin', f)
    print(structure)
The get_structure() method takes two inputs:
An ID — a short name you choose (e.g.
'myoglobin')A file handle — the open mmCIF file
Tip
mmCIF files can be large. The parser loads the structure into memory so you can query it easily. For most single-protein structures this is fine; very large complexes may require more memory or streaming approaches.
Understanding the structure hierarchy
Biopython represents a structure using a hierarchy:
Structure: top-level, one per file
└──Model: Possible 3D arrangement of the atoms (usually just 1)
    └──Chain: Continuous polymers (e.g., hemoglobin is composed of four globin chains)
        └──Residue: Monomers (e.g., GLY, ALA, VAL, etc.)
            └──Atom: Individual atoms (e.g., N, C, O, etc.) with 3D coordinates
For example, imagine this structure:
Structure
└── Model 0
    └── Chain A
        └── Residue 1: LEU
            └── Atom: N
            └── Atom: CA
            └── Atom: C
            └── Atom: O
        └── Residue 2: VAL
            └── Atom: N
            └── Atom: CA
            └── Atom: C
            └── Atom: O
            └── Atom: CB
            └── Atom: CG1
            └── Atom: CG2
English translation: One structure file, with one model, containing one protein chain (A) made of amino acids, each built from atoms.
You typically iterate with nested loops over structure → model → chain →
residue → atom. For example, to count chains, residues, and atoms:
num_models = 0
num_chains = 0
num_residues = 0
num_atoms = 0

for model in structure:
    num_models += 1
    for chain in model:
        num_chains += 1
        for residue in chain:
            num_residues += 1
            for atom in residue:
                num_atoms += 1

print(f"Models: {num_models}")
print(f"Chains: {num_chains}")
print(f"Residues: {num_residues}")
print(f"Atoms: {num_atoms}")
Models: 1
Chains: 1
Residues: 153
Atoms: 1210
Each object in our structure has an id (e.g., model.get_id(), chain.get_id(), etc.)
for model in structure:
    print(f"Model: {model.get_id()}")
    for chain in model:
        print(f"Chain: {chain.get_id()}")
Model: 0
Chain: A
Most structures, like this one, have only one model. Some NMR or computationally-predicted structures may have many models (an ensemble). If we had an ensemble of models, their IDs would be printed in numerical order, starting at 0.
We also see that our structure only has one chain (A). This is because myoglobin is made up of a single polypeptide chain. Some structures are made up of multiple polymers. For example, hemoglobin is a tetramer, consisting of four polypeptide chains. In this case, we would have Chains A, B, C, and D.
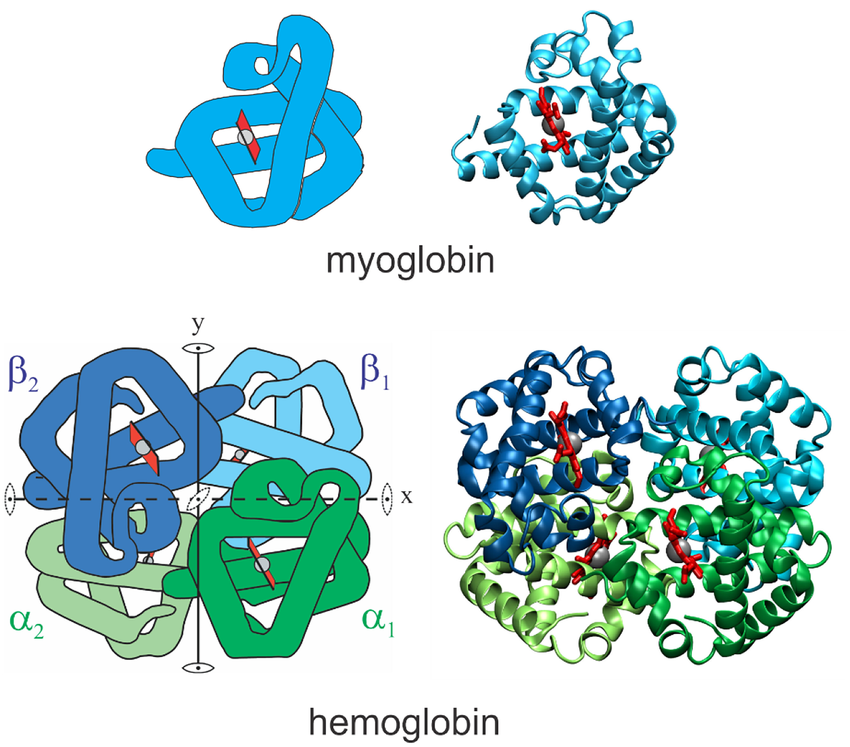
Structures of myoglobin and hemoglobin. Notice how hemoglobin is composed of four polypeptide chains: two alpha chains and two beta chains. Source: Eaton 2021
Let’s see what happens when we use residue.get_id(). We’ll also use residue.get_resname()
to print the name of each residue:
for model in structure:
    for chain in model:
        for residue in chain:
            print(residue.get_resname(), residue.get_id())
VAL (' ', 1, ' ')
LEU (' ', 2, ' ')
SER (' ', 3, ' ')
...
GLY (' ', 153, ' ')
OH ('H_OH', 154, ' ')
HEM ('H_HEM', 155, ' ')
Now this is interesting! When we use residue.get_resname(), we see the actual names
of each residue within Chain A (e.g., VAL, LEU, etc.). We know from earlier that our
chain is made up of 155 residues, but not all of these are amino acids! The last two lines in
our output show that residue 154 is OH (a hydroxide ion), and residue 155 is HEM (a heme group).
The output of residue.get_id() is much different from what we’ve seen thus far. Each
residue ID is a tuple with three elements:
(hetfield, resseq, icode)
hetfield= The hetero-field identifies whether the residue is a standard amino/nucleic acid or something else:' '= standard amino acids and nucleic acidsW= water moleculeH_name= Other hetero-residues (e.g., H_OH for hydroxide ion)
resseq= The sequence identifier is an integer describing the position of the residue in the chainicode= The insertion code is a string that is sometimes used to preserve a certain desirable numbering scheme.For example, a Ser 80 insertion mutant (inserted between a Thr 80 and an Asn 81 residue) could look like this:
THR (' ', 80, 'A')
SER (' ', 80, 'B')
ASN (' ', 81, ' ')
Finally, we can use atom.get_id() with atom.get_coord to print each atom and its 3D
coordinates (x, y, z) for the first residue:
for model in structure:
    for chain in model:
        for residue in chain:
            for atom in residue:
                print(residue.get_resname(), atom.get_id(), atom.get_coord())
            break
VAL N [-2.9 17.6 15.5]
VAL CA [-3.6 16.4 15.3]
VAL C [-3.  15.3 16.2]
VAL O [-3.7 14.7 17. ]
VAL CB [-3.5 16.  13.8]
VAL CG1 [-2.1 15.7 13.3]
VAL CG2 [-4.6 14.9 13.4]
This code returned the residue name of the first residue in our chain (VAL), along with each atom (N, CA, C, etc.) and its 3D coordinates.
Summary of Structure Methods
The table below summarizes the most commonly used methods at each level and what they return.
Hierarchy Level |
Object Type |
Common Methods |
What They Return / Do |
|---|---|---|---|
Structure |
|
|
Structure identifier string (e.g. |
Model |
|
|
Model number (e.g. |
Chain |
|
|
Chain identifier (e.g. |
Residue |
|
|
Residue name (e.g. |
|
Tuple |
||
Atom |
|
|
Atom name (e.g. |
|
List of 3D coordinates |
||
|
Chemical element symbol (e.g. |
For more methods and cool things you can do with structural biology data in Biopython, see this documentation.
EXERCISE
Exercise 1: Print Chain ID: Num Residues
Using the same structure file (e.g. 1MBN.cif), write a short script that:
Parses the mmCIF file with
MMCIFParser.Loops over models and chains.
For each chain, prints the chain ID and the number of residues in that chain.
Example output: Chain A: 155 residues.
 1from Bio.PDB.MMCIFParser import MMCIFParser
 2
 3parser = MMCIFParser()
 4with open('1MBN.cif', 'r') as f:
 5    structure = parser.get_structure('myoglobin', f)
 6
 7for model in structure:
 8    for chain in model:
 9        chain_id = chain.get_id()
10        num_residues = 0
11        for residue in chain:
12            num_residues += 1
13        print(f"Chain {chain_id}: {num_residues} residues")
Exercise 2: List All Hetero-residues in a Chain
For this exercise, we want to find all the hetero-residues in Chain A
and print their residue name and ID.
Use the fact that residue.get_id() returns a tuple
(hetfield, resseq, icode) that we can unpack (a, b, c = (10, 20, 30)).
Hint: Standard amino acids and nucleic acids have hetfield == ' '.
Example output:
Chain A: hetero residues
OH id=('H_OH', 154, ' ')
HEM id=('H_HEM', 155, ' ')
 1from Bio.PDB.MMCIFParser import MMCIFParser
 2
 3parser = MMCIFParser()
 4with open('1MBN.cif', 'r') as f:
 5    structure = parser.get_structure('myoglobin', f)
 6
 7for model in structure:
 8    for chain in model:
 9        chain_id = chain.get_id()
10        print(f"Chain {chain_id}: hetero residues")
11        for residue in chain:
12            hetfield, resseq, icode = residue.get_id()
13            if hetfield != ' ':
14                print(f"{residue.get_resname()} id={residue.get_id()}")