Documentation
As we have probably all heard before, good documentation is almost as important (if not equally as important) as good code itself. You may have written some elegant and powerful code to solve your problems today, but weeks or months from now, that code may become functionally useless if you forget what it does or how to call it. Python3 users have a special built-in tool at their disposal called docstrings that make documenting functions easy. After going through this module, students should be able to:
Write well-crafted docstrings for all functions
Add type hints to function definitions
Write effective READMEs for a project
Docstrings
Docstrings are special strings that appear immediately following function definitions in our code. They should be surrounded by three double-quotation marks on each side, and they may span multiple lines. For example:
def a_function():
    """
    This is a docstring.
    """
    # code goes here
    return
The above is a valid docstring, but it is not a very helpful docstring. When you write docstrings, at a minimum try to include the following sections:
A short description of the purpose of the function
A list of arguments, including type
A list of returned values, including type
A better template for a docstring (based on the Google Style Guide) might look like:
def a_function(arg1: type, arg2: type) -> type:
    """
    This function does XYZ.

    Args:
        arg1: Define what is expected for arg1.
        arg2: Define what is expected for arg2.

    Returns:
        result: Define what is expected for result.
    """
    # code goes here
    return(result)
The description should be succinct, yet complete. Arguments should be listed by name and the expected type (e.g., bool, float, str, etc.) should be stated. The return result(s) should be listed along with the expected type(s).
Let’s look at one more example using a real function:
def add_and_square(num1: float, num2: float) -> float:
    """
    Given two numbers, this function will first add them together, then square the sum
    and return the result.

    Args:
        num1: The first number.
        num2: The second number.

    Returns:
        result: The square of the sum of input arguments.
    """
    result = (num1+num2)**2
    return(result)
Note
Notice above we are using more-or-less complete sentences with proper grammar.
EXERCISE
Let’s add docstrings to our fastq_summary.py code we’ve been working on:
def summarize_record(record) -> ReadSummary:
    phred_scores = record.letter_annotations['phred_quality']
    average_phred = sum(phred_scores) / len(phred_scores)

    return ReadSummary(
        id=record.id,
        sequence=str(record.seq),
        total_bases=len(record.seq),
        average_phred=round(average_phred, 2)
    )
def summarize_fastq_file(fastq_file: str, encoding: str) -> FastqSummary:
    reads_list = []

    with open(fastq_file, 'r') as f:
        for record in SeqIO.parse(f, encoding):
            reads_list.append(summarize_record(record))

    return FastqSummary(reads=reads_list)
def write_summary_to_json(summary: FastqSummary, output_file: str) -> None:
    with open(output_file, 'w') as outfile:
        json.dump(summary.model_dump(), outfile, indent=2)
def summarize_record(record) -> ReadSummary:
    """
    Given a single FASTQ record, extract basic read statistics and
    return them as a ReadSummary instance

    Args:
        record: A single FASTQ SeqRecord produced by BioPython's SeqIO
            parser, containing the read ID, sequence, and per-base Phred
            quality scores.

    Returns:
        ReadSummary: A ReadSummary instance containing the read ID, sequence,
            total number of bases, and average phred quality score.
    """
    phred_scores = record.letter_annotations['phred_quality']
    average_phred = sum(phred_scores) / len(phred_scores)

    return ReadSummary(
        id=record.id,
        sequence=str(record.seq),
        total_bases=len(record.seq),
        average_phred=round(average_phred, 2)
    )
def summarize_fastq_file(fastq_file: str, encoding: str) -> FastqSummary:
    """
    Given as FASTQ file, this function iterates over all reads in the file,
    summarizes each read, and returns the results as a FastqSummary instance.

    Args:
        fastq_file: Path to the input FASTQ file
        encoding: FASTQ format string used by BioPython to interpret sequence
            and quality score data.

    Returns:
        FastqSummary: A FastqSummary instance containing summaries for all reads
            in the input FASTQ file.
    """
    reads_list = []

    with open(fastq_file, 'r') as f:
        for record in SeqIO.parse(f, encoding):
            reads_list.append(summarize_record(record))

    return FastqSummary(reads=reads_list)
def write_summary_to_json(summary: FastqSummary, output_file: str) -> None:
    """
    Given a FastqSummary instance, serialize the data and write it to a JSON file.

    Args:
        summary: A FastqSummary object containing per-read summary data.
        output_file: Path to the output JSON file.

    Returns:
        None: This function does not return a value; it writes output to disk.
    """
    with open(output_file, 'w') as outfile:
        json.dump(summary.model_dump(), outfile, indent=2)
Helpful Python Functions
The dir() function is a built-in Python tool used to list the attributes (methods, variables, etc.)
of an object (a string, list, dictionary, class instance, or module). For built-in types, it will list
all the methods you can use with that specific data type. For modules, it prints all the functions, classes
and constants available within that module:
Open the Python3 interpreter, import your models.py and fastq_summary.py modules, and explore using the
dir() function:
>>> import models, fastq_summary
>>> my_string = "hello world"

# Inspecting an object instance
>>> dir(my_string)
['__add__', '__class__', 'capitalize', 'casefold', 'center', 'count', ...]

# Inspecting a module
>>> dir(models)
['BaseModel', 'FastqSummary', 'ReadSummary', '__builtins__', '__cached__', ...]

>>> dir(fastq_summary)
['FastqSummary', 'ReadSummary', 'SeqIO', '__builtins__', ..., 'json', 'main', 'summarize_fastq_file', 'summarize_record', 'write_summary_to_json']
Now that we’ve inspeced our modules, we can use the help() function to learn how to use them:
>>> help(str)
>>> help(str.capitalize)

>>> help(models)
>>> help(models.ReadSummary)

>>> help(fastq_summary)
>>> help(fastq_summary.write_summary_to_json)
What do you notice about the output of that last command? It contains the information that you put into the docstring!
Type Hints
Type hints in function definitions indicate what types are expected as input and output of a function. We briefly went over type hints in the JSON material, but let’s talk more about how they work.
No checking actually happens at runtime, so if you send the wrong type of data as an argument, the type hint itself won’t cause an error. Think of type hints as documentation or annotations to help the reader understand how to use a function.
Warning
In the code blocks below, we omit docstrings for brevity only. Please continue including docstrings in your code.
Type hints take the form:
def a_function(arg_name: arg_type) -> return_type:
    # code goes here
    return result
In the above example, we are providing a single argument called arg_name that should be of type arg_type.
The expected return value should be a return_type. Let’s look at an example using a real function:
def add_and_square(num1: float, num2: float) -> float:
    result = (num1+num2)**2
    return(result)
Although Python3 does not check or enforce types at run time, there are other tools that make use of type hints to check types at the time of development. For example, some IDEs (including PyCharm) will evaluate type hints as you write code and provide an alert if you call a function in a way other than what the type hint suggests. In addition, there are Python3 libraries like mypy that can wrap your Python3 programs and check / evaluate type hints as you go, provided errors where types don’t match.
Warning
Be aware that there is some redundancy in the information contained in type hints and in the docstrings. Be careful not to let them get out of sync as your code evolves.
README
A README file should be included at the top level of every coding project you work on. Websites like GitHub will automatically look for README files and render them directly in the web interface. Markdown is probably the most common syntax people use to write READMEs. It is very easy to create headers, code blocks, tables, text emphases, and other fancy renderings to make the README pleasant and easy to read.
Note
In this class we ask you to include READMEs in each of your homework folders on GitHub. Each homework is essentially a standalone project, so a dedicated README for each is warranted.
At a minimum, plan to include the following sections in all of your READMEs:
Title: a descriptive, self-explanatory title for the project.
Description: a high-level description of the project that informs the reader what the code does, why it exists, what problem it solves, etc.
Installation: As we advance into the semester our code bases will become more complex with more moving parts. Eventually we will need to start providing detailed instructions about getting the project working plus any requirements.
Usage: The key here is examples! Show code blocks of what it looks like to execute the code from start to finish. Describe what output is expected and how it should be interpreted.
Other general advice includes:
Use proper grammar and more-or-less complete sentences.
Use headers, code blocks, and text emphases (e.g. bold, italics) to make the document readable.
Be prepared to include other information about authors, acknowledgements, and licenses in the READMEs as appropriate
Spend some time browsing GitHub and look for READMEs of other popular projects. There are many correct ways to write a README.
VS Code supports previewing Markdown files–you just just start writing Markdown text, save the file with the
.mdextension, and then toggle the visualization with⇧⌘Von a Mac, or simply right-click the file and selectOpen Preview.
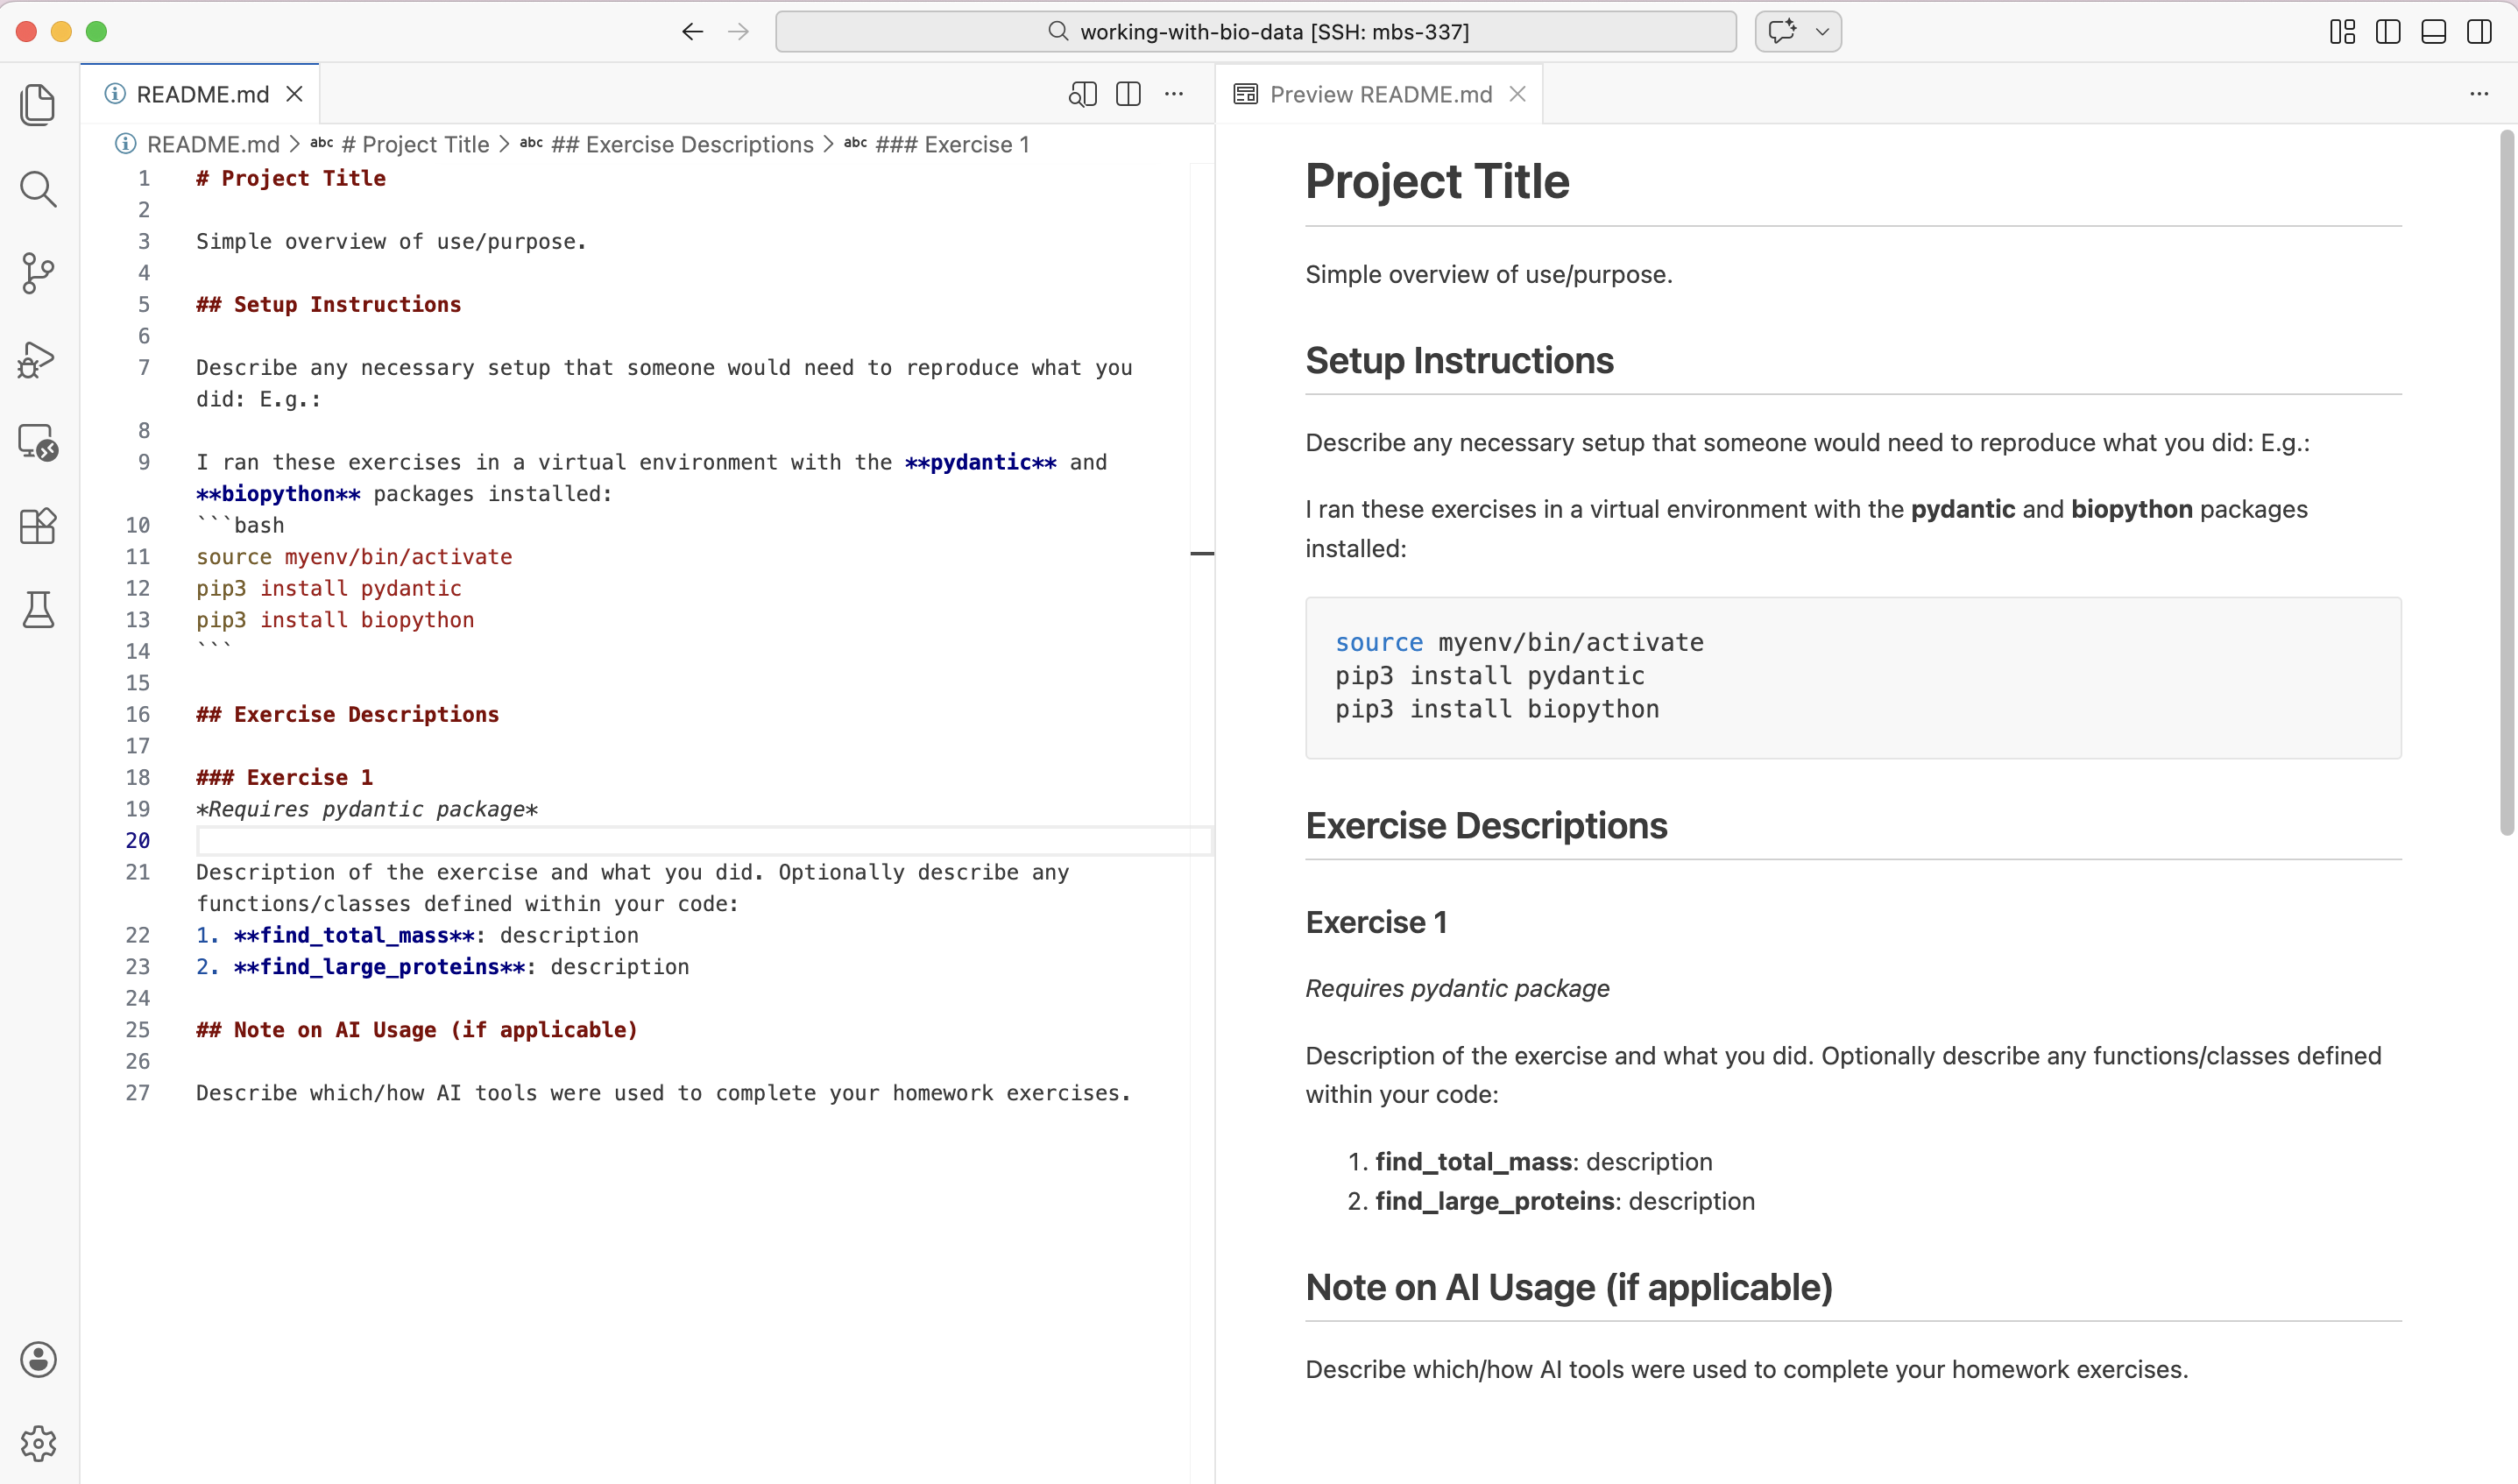
The raw README.md file and its preview displayed side-by-side in VS Code.
Remember, the README is your chance to document for yourself and explain to others why the project is important, what the code is, and how to use it / interpret the outputs. The advice above is general advice, but it is not one-size-fits-all. Every project is different and ultimately your README may include other sections or organization schemes that are unique to your project.
Additional Resources
Many of the materials in this module were adapted from COE 332: Software Engineering & Design